headintheforest

things i like to eat

Adventures in Portland pt. 1

My good friend Diggles and I are on a culinary excursion to Oregon in general and to Portland in specific.

After three days of road-tripping (Edmonton, AB to Mt. Robson Provincial Park, BC to Cultus Lake, BC to Portland, OR), we arrived pleasantly fatigued and ready for adventure.

Our first line of business was to hit up our BNB in South East Portland which became a bit of a situation since we hadn’t looked at our e-mail for three days. To make contact and get in, we had to find Wifi, so we went to the nearest and coolest looking place around: Pix Patisserie.

They hooked us up AND they also had delicious, delicious pastries and beer. WIN x 2! I had a fleur de sel macaron and an organic raspberry beer and Diggles had a blue cheese truffle and some beer that I can’t remember.

We got in to our BNB and it was fab! It even had a bowl of delicious fresh-picked raspberries awaiting us. JOY! Then we went right back out and ate Israeli falafels from Gonzo, a food cart down the street. I’ve legit never had a falafel so moist on the inside and yet crispy on the outside. The ingredients were fresh and you can even name your spiciness level. We picked medium and it was all good until the last couple of bites where all the hot sauce had pooled. WOW! It was spicy. and. so. good. I’m drooling just thinking about it.

Today, we went to the most enjoyable brunch place ever: Simpatica Dining Hall. It normally has a wait and is acclaimed for it’s brunch, but we strolled on in due to some inclement weather (misty rain). The restaurant is in the basement and has an interesting mix of industrial, rustic and chic decor. It has interesting exposed lightbulb fixtures, roughhewn boards and a concrete wall – a combo to cry with joy over. While doing said crying with joy, I ate the first bite of my meal: Stumptown coffee, Lavender waffles with strawberry syrup and chantilly cream and 2 poached eggs. Diggles had Strata with duck confit and arugula salad. Need I express how mouth-wateringly delicious it was? Me thinks not. LAVENDER. WAFFLES. *dies*

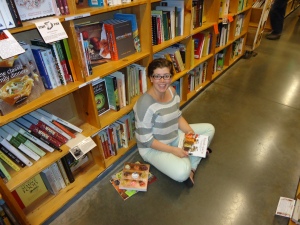
As the rain continued to fall, Diggles and I moseyed over to Powell’s City of Books, an independent bookstore that sells new and used books. It’s said to be the largest in the world and is beyond the most magical place on earth. The books are organized into themes and then placed in colour coded rooms for ease of navigation. My favourite place was the orange room where the books of gardening, cooking, sustainable living, crafts, knitting etc. are kept. That room was as big as a normal bookstore. I was actually giddy with excitement and over-stimulation. To “calm down” Diggles and I went to the in-store coffee place, where you can bring the books in (up to 5) while you ponder their purchase and drink coffee. OH! Did I mention that the coffee place serves soft pretzels? MMMYESSS. Coffee, Diggles, books on my favourite subjects and soft pretzels. *dies again*

Portland is amazing. People are friendly. Everyone bikes. Vegetarian food abounds. I walked into a store that looked awesome and it was Anthropologie. They allowed dogs inside! Recycle facilities everywhere! A special park event to feed people in need. A million vintage stores. Specialty beers! GREATNESS IN EVERY DIRECTION!!!

We ate a very late lunch at a vegan restaurant (I can’t remember the name) and the food was flavourful. I had tempeh in a peanut sauce with rice, beans and a coleslaw salad. It was nutty and filling with a slight sweetness. Diggles had 3 bean chili and cornbread (Surprised, Barefoot Panda?). We tried a strange drink called Eva’s Herbucha Comforting which is a fermented tea with mulling spices. It was … interesting. I couldn’t really describe it when Diggles and I were drinking it. Spicy and sweet? Warm, but cold? Floral, somehow? Either way, Diggles really liked it and finished it off.

After looking longingly in the window of some closed yarn shops and then exploring some interesting second hand stores (I scored some cool pale pink shoes!), we went to the Laurelhurst Theater where you can drink beer and eat pizza in the movie!! They have a ledge built into the back of the seats for your food and drink and then you sit back and have a pizza and popcorn eating, beer drinking, movie watching good time. We saw Headhunters, a Norwegian film about an art thief. The movie was rated R and definitely lived up to it with violence and full frontal nudity. That being said, it was smart and funny and I loved every subtitled minute of it!

And now? Off to bed for more eating, exploring and relaxing tomorrow!!

1 Comment »

Adventures in grade one

Greetings!

As I may have previously mentioned, I teach grade one. This is my first year, I have 18 kids in my French Immersion class and I absolutely LOVE them. No matter what mood I’m in when I get to school, I’m beyond happy within ten seconds of them arriving in class. They’re so loving, enthusiastic and curious and, most of the time, so am I!

One of the most satisfying parts of teaching grade one is the epic amount of growth that happens with your students. I’m assuming all grade one teachers feel this way, but when the kids are learning a second language, it’s especially noticeable. They come to class in September with limited number understanding, phonetic awareness and oral French and leave speaking, reading and writing in both languages with a fairly good understanding of numbers to 100. It’s enough to basically blow your mind.

I will now provide you with transcripts pieced together from my experiences to prove my point:

September

Me: Bonjour les amis! Trouve ton crayon, s’il vous plait. (Wild gestures demonstrating getting out your pencil)

Student: …. (Stares)

Me: Trouve ton crayon. (Get a pencil and show it to student)

Student: I don’t speak French.

April

Me: Bonjour les amis! Qu’est-ce que vous avez faites cette fin de semaine?

Student: J’ai joué avec ma soeur dans le parc. J’ai vu un oiseau dans un nid qui chante. Grand-maman et grand-papa visiter à ma maison. C’était fantastique! Aussi, regarde!  (Hands me a fully illustrated three part story about penguins written in French over the weekend)

For a transcribed all english version of this story, click here.

Now I know that the April student’s grammar isn’t perfect, but COME ON! Look at that progress!! Teacher’s in other grades have told me that they just don’t see that kind of visible growth in their students. This pretty much means that my grade is the most awesome, as is my class and my school.

A lot of the time, the awesomeness of my teaching career makes me feel like this:

Obviously, I would change the words to say that I like things about my teaching career. As it happens, I also feel pretty excited about my sisters, hair, whole house and all the other things she listed. hehehe

I’ve wanted to show you pictures of my class before and so I will now take you on a tour of my classroom. It’s changed somewhat since these pics, but you’ll get the jist.

This is my French reading corner. It is actually even more awesome now because I have more baskets. I super love the leaf and so do the kids. They like to sit underneath it when we have silent or partner reading or even when I’m reading them something over there. It is the most coveted of all places to sit in my class, other than my chair. They also love to sit in my chair! I want to get a carpet for this corner, but I already spend so much money on my class that I have to wait for this one item. The plan is that if my contract is renewed (or upgraded to permanent status!), Dave will get me the one I want for my birthday! Woot!
I’ve moved this table around a lot this year. Recently, it was a space where kids could write adventure stories. It even has had a stint in the hallway as a space for my parent volunteers. I moved it into this space under the window at the beginning of the month so that the kids could plant seeds and tend their plants for our plant unit (I’ll post about that on another day!).

Ok, there’s a lot happening in this photo! This table is an important space in my class as it’s used for centre activities, small group work and one on one time with me. I do a lot of my reading conferences here. A memorable activity that happened at this table was the time we made little race cars. It involved painting and nailing and, eventually, racing, so you can imagine how happy the kids were! To the left of this table is the English word wall and leveled book shelf.

This is one of the spaces that drove me the most crazy this year. It took me many months indeed to figure out how to organize all the math books, math manipulatives, whiteboards, etc. I feel so good about getting this organized and have received many compliments about it.

I love this bulletin board! It is part of a project that we did on places in our community. The idea was to introduce the community to our stuffies since they don’t get out much. The students had to pick their favourite place in our community, go there with their stuffy and take a picture. We then mapped their location on our map and used the picture in a written project. After all that, they presented their project orally with their stuffy. It was a huge hit! Plus the pictures are so cute, you could just cry.

Anywho, that’s all I have for pics of my class at the moment. I plan on sharing some of my ideas and activities that I do in grade one with you all, so stay tuned!

How do you like to organize your class? Do you think that your grade level is the best? Why?

2 Comments »

Adventures in gnocchi and tomatoes

A couple years ago, I was leaving on a seven week trip around the world. Well, not really, but it seemed that way to me! I’m from Western Canada and travelled to a couple countries in Africa and a handful in Europe. For the first five weeks, I was doing a volunteering/teaching practicum trip in Kenya, followed by a backpacking trip in Kenya and Tanzania. For those weeks, I was fairly isolated and had limited and infrequent internet abilities. While all of this was going on, I was leaving Diggles back home and had almost no contact with him at all. After the first five weeks, he met me in Amstersam and we went travelling in Europe for two weeks. It was a wonderful time in my life!

A few days before I left, I made a special meal for Diggles to say good-bye and thank him for supporting me in my volunteering endeavours. The gnocchi that follows was a part of that meal. That was also the first time I made (read: successfully made) homemade pasta. For these reasons and more, it’s a meal that has stuck with me. I can remember it so clearly.

The pictures in this post are from the most recent time that I made this gnocchi (an Anna Olson recipe, of course!). The original recipe calls for a red pepper coulis, but this meal was for a Monday Night friend extravaganza and red peppers aren’t a group favourite. I instead made a traditional marinara sauce with delicious San Marzano tomatoes that I got at the Italian Centre Shop. It was extremely successful and the tomatoes were worth the special trip. Diggles said that this gnocchi and tomato sauce was the best it’s ever been! My sister (an occasional member of the Monday Night group) argued that the gnocchi were not gnocchi at all, but rather “cheese balls”. Nonetheless, she cleared her plate. No matter the name, this meal is a winner and one that I will return to often.

Recipes

Goat Cheese Gnocchi

(Recipe from Anna Olson via The Food Network)

These quantities are what I used and make a double-batch.

1 pkg (300 g) fresh goat cheese, at room temperature

1 pkg (250 g) light cream cheese, at room temperature

6 tbsp green onion, finely chopped

3 tbsp parsley, freeze-dried and finely chopped

2 tbsp lemon zest, finely grated

3 eggs, separated

2 cup all purpose flour

3/4 teaspoon salt

For gnocchi, beat goat cheese and cream cheese until smooth.

Stir in green onion, parsley, lemon zest and egg yolks until smooth. Fold in flour half of flour.

Whip whites with salt to soft peaks.


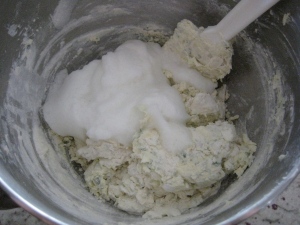
Fold half into goat cheese mixture. Fold in the rest of the flour and egg whites.

Bring large pot of water to a boil and salt generously.

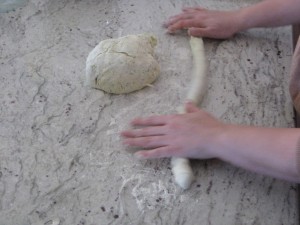
Rip off a chunk of dough and roll out into a log shape about ¾- inch in diameter.

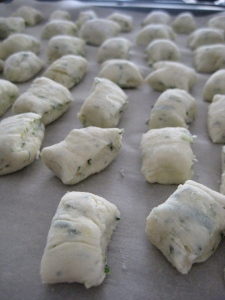
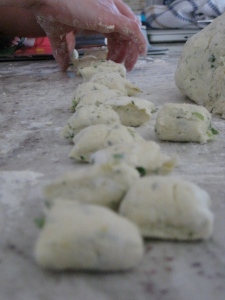
Cut into ½ inch pieces (or approx. width of your thumb).

Place on a parchment lined tray and repeat with the rest of the dough. Keep covered in the fridge until ready to prepare and serve.

Drop gnocchi into water and simmer until they float, about 3 minutes. Gently remove with a slotted spoon and set on a plate.

To serve, heat sauce (recipe below) and spoon into a bowl. Gently place warm gnocchi on top and serve.

Bright and Delicious Marinara Sauce

(Adapted from The Food Maven)

3 tablespoons extra virgin olive oil

1/2 medium onion, finely chopped

1 large clove garlic, lightly smashed

1 28-ounces can plum tomatoes

1/2 teaspoon salt

1 tsp basil

In a saucepan, over medium-low heat, combine the oil and the garlic. Cook the garlic, pressing it into the oil a couple of times to release its flavor, until it barely begins to color on both sides. Remove the garlic.

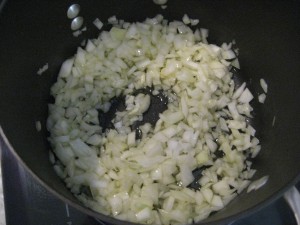
Add the onion and cook over medium-low heat, stirring frequently, until the onion is fully tender, 8 to 10 minutes. If the onion begins to color before it is tender, add water by the tablespoon.

Add the tomatoes. Stir well. Add the salt and black pepper to taste. Increase the heat slightly and bring to a brisk simmer.

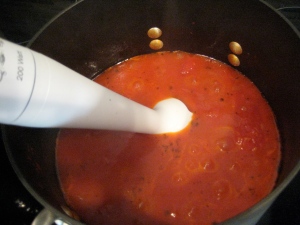
Adjusting the heat as the sauce cooks down, and stirring frequently, simmer briskly for about 10 minutes. Add the basil and simmer until the sauce has thickened and reduced, about 5 minutes. Using an immersion blender, blend the sauce until smooth. Ladle into bowls.

Do you like gnocchi? Even if it’s not made of potatoes? Do you think these should be called “cheese balls”?

1 Comment »

Adventures in red onions

I love grocery shopping. I usually go with Diggles, but sometimes I go with Barefoot Panda. There’s something to be savoured in the possibilities that exist with all the ingredients at your fingertips. I usually make a list and a meal plan before we go, but often change it when I see a perfectly ripe fruit or vegetable or a certain ingredient that I like. This time, I changed my meal plan because I spotted a delicious recipe in the produce aisle.

At one of the grocery stores I frequent, there are recipes on a wire rack. Maybe these are meant to inspire the uninspired? Maybe they’re instructions on how to use ingredients that you might not otherwise? Either way, I found a caramelized onion flatbread recipe in the display and decided to try it out. What a great idea!

Caramelized Red Onion Flatbread

for the dough

adapted from Epicurious

3/4 (or more) cup warm water

2 1/4 tsp active dry yeast (or 1 envelope)

2 cups (or more) all purpose flour

1 tsp sugar

3/4 tsp salt

3 tbsp (and 1 tsp) olive oil

sprinkle of cornmeal

sprinkle of thyme

for the rest

2 tsp olive oil

1 tbsp unsalted butter

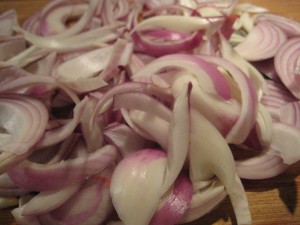
1 large red onion, sliced 1/4 inch thick

1 tsp dried thyme

1 tbsp honey

1 tbsp balsamic vinegar

1/2 pkg light Boursin soft cheese

for the dough

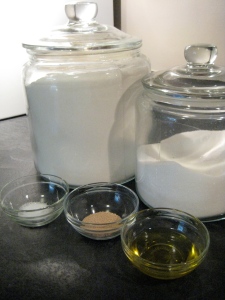
Pour 3/4 cup warm water into small bowl. Water should be warm to the wrist, but not hot. Stir in yeast and stir to dissolve.

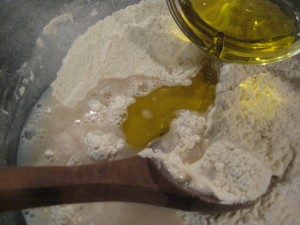
Mix flour, sugar, and salt in large bowl. Add yeast mixture and 3 tablespoons oil. Stir to mix.

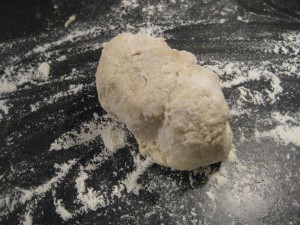
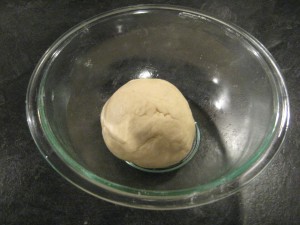
Use hands to work dough into a sticky ball. If the dough is too dry (as pictured), add more warm water one tablespoon at a time.

Transfer to lightly floured surface. Knead dough until smooth, adding more flour by tablespoonfuls if dough is very sticky. I kneaded for about about 3 minutes, but you really just want the dough to have a consistent structure. When you pull the dough apart slightly, it should shrink back up. Notice the difference in the pre-kneaded and post-kneaded dough texture.


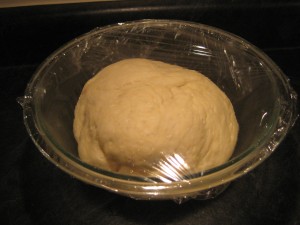
Lightly oil a large bowl. Turn the dough ball in the bowl to coat lightly with oil. This helps the dough stay moist and non-stick as it rises. Cover bowl with plastic wrap and let dough rise in a warm place until approx. doubled in size (about 1 hour).


Read a book and drink some coffee for about 40 minutes. Alternatively, you could do something productive.

for the rest

Preheat oven to 4ooF. Sprinkle a baking sheet with cornmeal.

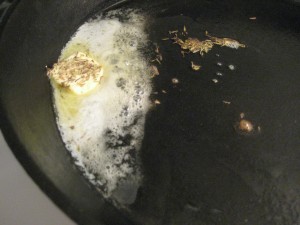
Heat the oil in a large skillet on medium heat. Add butter and thyme; melt.

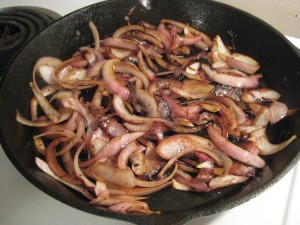
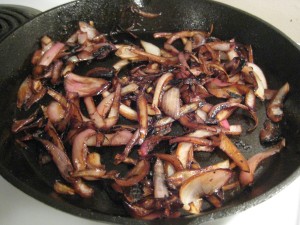
Add onions. Let the onions brown for 3 to 4 minutes, without stirring. (I overdid it on this step and burnt mine a little. Be careful!)


Add honey and balsamic. Cook for 15 to 20 min or until caramelized, stirring occasionally. Remove from heat let cool slightly.


While the onions are caramelizing, punch down the dough. Roll out the dough by starting in the center and working outward toward the edges. (You want it to fit on your baking sheet.)

Place on cornmeal covered baking sheet. Brush the top with 1 tsp of oil and a sprinkle of thyme.


Bake in the oven until top is golden brown, about 10 minutes. Take out and let cool slightly.

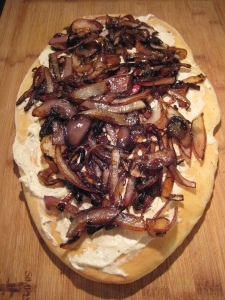
Spread the cheese on the flatbread.

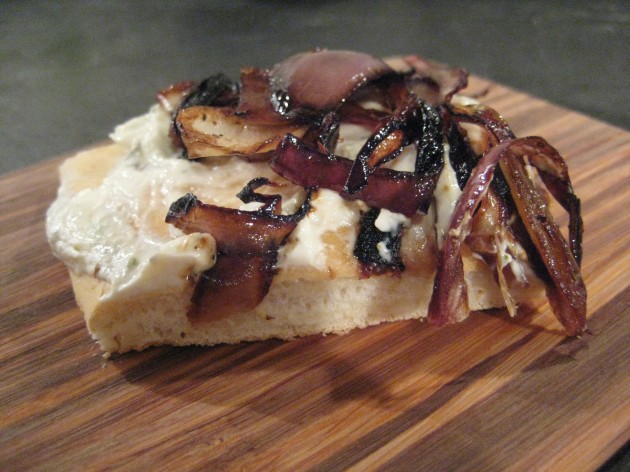
Spread the onions on the flatbread. Cut into squares and serve. Cry with happiness as you eat.

Notes on this recipe

You can use packaged pizza dough for this recipe if you want. You can also make the dough one day ahead and store in an airtight container in the fridge. The Boursin cheese is quite salty so I cut the salt out of the onions. Feel free to season to your preference.

I loved this dough so much. I will fo’ sho’ make this again and I am even pondering what other dishes I make that could use this dough. You rock, Epicurious!

The salad that I served with this flatbread was also delicious and was composed of green leaf lettuce, cucumber, carrots, radishes, mushrooms and a sliced, hard-boiled egg. I whipped up a vinaigrette made with olive oil, balsamic vinegar and dijon mustard. Yumzor!

Do you like caramelized onions? What cheese would you use in this dish?

Leave a comment »

Adventures in Cabbagey Laziness

Last night, I had Easter dinner with my aunts, uncles, sisters, parents and cousins. Extended family functions such as that have been one of the highlights of my life because most of my cousins are about the same age as me. We used to play constantly. Our family has a lake lot and, when we were young, it had an old log cabin on it (complete with outhouse). Some of my best childhood memories were there and that may be one of the places that lead me to fall in love with nature. I can distinctly remember eating toast with Gran’s strawberry jam while walking in the dew covered grass. The birds would chirp and you’d see all kinds of wildlife, including foxes, toads, deer, coyotes, owls, woodpeckers and eagles. There was even a memorable bear sighting in the area that led to the bear being trapped and released.

One of my favourite things to do at the lake was to bring my Archie comics and a bag of sunflower seeds down to the dock and read with the water lapping underneath me. On one such day, I even saw a pelican with it’s bill full.

None of this has anything to do with the following recipe, except that my family, whom I love, really enjoyed this dish last night and asked me to blog it. I would personally change this recipe somewhat the next time I make it and I’ve included some notes on that subject below. The instructions that follow are how I made it for the family function.

Lazy Cabbage Rolls

(adapted from Allrecipes)

1 pkg soy ground beef

2 cloves garlic, minced

1/2 cup onion, chopped

1 1/2 (355 ml) cans tomato sauce

1 small head of cabbage, chopped

1/2 cup uncooked brown basmati rice

1/2 tsp salt

1/4 tsp cayenne pepper

2 cups vegetable broth

sour cream

Throw everything into the slow cooker. Stir. Put on high for 5 hours. Serve with sour cream.

Notes on this recipe

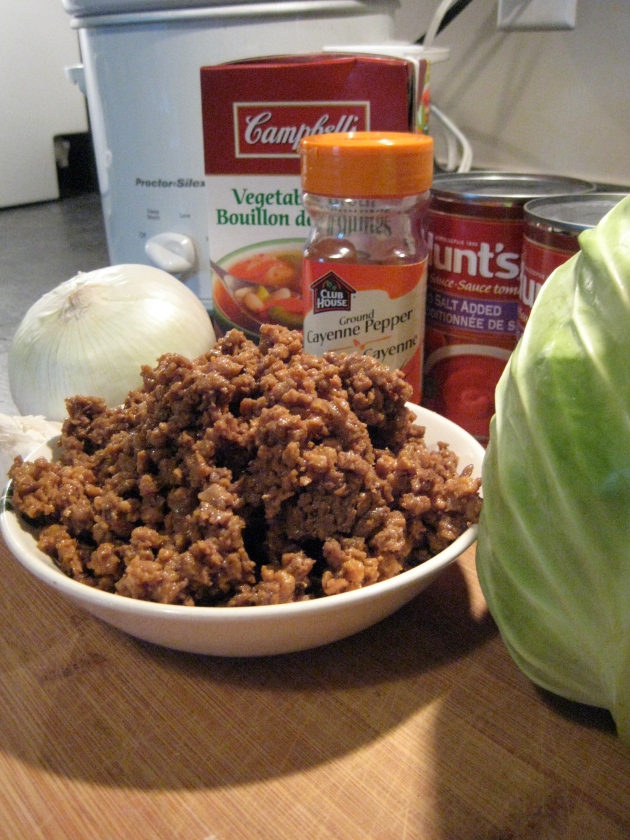
First of all, doesn’t this take lazy to a whole new level? Yes. Yes, it does. Unfortunately, I forgot to take a picture of this dish when it was finished, but it pretty much looks like reddish-orange rice with thick sauce. Like you couldn’t have pictured that by the ingredients, eh? Here’s a pre-cooked pic.

As I mentioned above, my family really enjoyed this recipe. I liked the flavour of the dish, but found the texture to be a little too mushy. Diggles said he liked it that way and that he “doesn’t like to chew cabbage”, but I think it can be improved upon. The next time I make it, I will do the following: substitute the tomato sauce for canned tomatoes, brown the “beef” with the onions and garlic and cook it in a pot for a half an hour to 45 mins.

The cooking time may flex depending on how the cabbage and rice cook, but I think that I would rather my cabbage and rice a little bit more al dente. The original recipe calls for this whole thing to go in the oven for one hour and I think I would even reduce that if I were to bake it. If you were to make it in your slow cooker, I would suggest putting it on low to prevent burning/mushing. If you like your cabbage mushy (or soft), you could put all the ingredients in the slow cooker and then add rice when you get home.

How do you like to cook cabbage? Soft and disintegrating, crunchy or in between? 

Leave a comment »

Adventures in gyoza

 When I moved out years ago, I discovered the joys of the Food Network. I particularly enjoyed Anna Olson’s “Fresh” and cried a thousand tears of sadness when it was cancelled. My bestie learned a lot of her baking and pastry skills from Anna’s previous show “Sugar” and, in the end, I learned quite a number of skills from my bestie. Needless to say, Anna Olson and the Food Network played a big part in my eventual love for food (and farmer’s markets!).

Unfortunately, I learned that one of the pitfalls of many cooking shows is their lack of vegetarian recipes. When veggie recipes are presented, they aren’t as exciting and often aren’t as varied in terms of their cuisines, ingredients and techniques.  One of the tricks I use to think outside of my cooking box is to adapt the techniques and flavour profiles from meat recipes into veg-friendly ones.

In honour of one of my favourite Anna Olson recipes, I present to you an adapted vegetarian version of her Japanese Gyoza. The first time I made them, I actually played the episode on my PVR, paused it, completed the step I had just watched and then returned to watch the next step. I learned so much that first time, including: how to make, steam and fry dumplings, test filling for flavour and use wonton wrappers.

If this is your first time making Gyoza, here are some things you should know before you start:

  • They take a long time! Plan for an afternoon so that you aren’t too stressed.
  • Due to the time factor, you might as well make a lot and then have lots in the freezer. Invite your friends over and make a million! Each friend can take home some dumplings and a new skill. In fact, that’s what I did today. I went to Barefoot Panda‘s house (my bestie) and enjoyed her company and talent while I toiled the afternoon away.
  •  They are totally worth the trouble. You should really try them! 🙂

Vegetarian Gyoza

adapted from Anna Olson

for the gyoza

1 pkg soy ground beef

3 cups finely shredded cabbage

2 tbsp soy sauce

2 tbsp ginger root, peeled and grated

1 1/2 tbsp  garlic, minced

1 tbsp sugar

1/2 tbsp lime juice


for the dipping sauce

2 tbsp soy sauce

1/4 tsp sesame oil

squeeze of lime

to cook

drizzle of oil

1 cup of water

for the gyoza

Mix the soy beef, cabbage, garlic, ginger, soy sauce, sugar and lime juice together.

Fry a spoonful in a pan to test the flavour of your filling, then adjust to your preference. The amounts of ingredients in this version of the recipe are adjusted to my taste, but your soy beef brand could need more or less salt, acidity or sweetness. Feel free to make it your own!

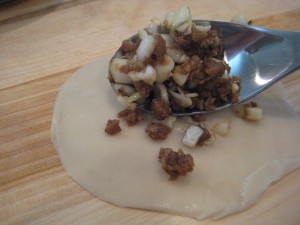
 In the pictures below, you will see how I organize my gyoza making centre. Make sure you have a little bowl of water, a tea towel and a spoon. Place a small teaspoon full of the filling in the centre. Be careful not to overfill! Don’t be afraid to scoop some of the filling back into the bowl.

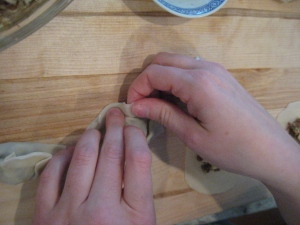
 Dip your finger in the little bowl of water and brush the outside rim of the won ton skin.

Fold the won ton skin over to make a half circle shaped dumpling.

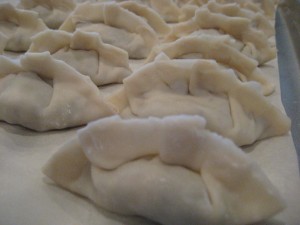
Press the edges together to seal the filling inside. After some practice, you can pleat the seam by folding the edges over in little mini fans.

Turn them so that the seam is facing upwards. Press the gyoza to flatten the bottom.

  Place them on a tray lined with parchment paper and with a tea towel. The tea towel keeps the moisture in and prevents the gyoza from shrivelling and cracking.

After filling and covering your tray with plastic wrap, put it in the freezer. Once frozen, the gyoza can be re-packaged into ziploc bags and will last in the freezer for 3 months.

to cook the gyoza

Heat oil in a non-stick pan on medium heat. Place gyoza flat side down and sauté until lightly browned.


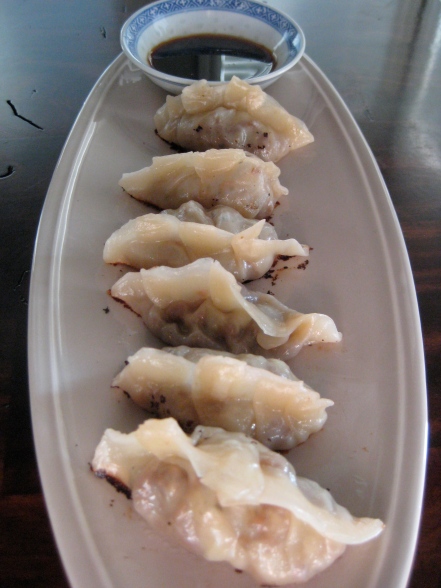
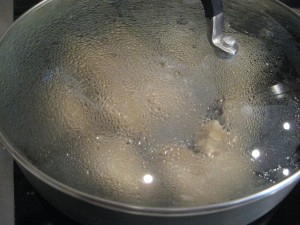
Add hot water to almost cover the dumplings and cover the pan. The steam will cook the gyoza turning them slightly transparent. Watch the water level in the pan. When the water has almost evaporated (approx 7 minutes), remove the lid and allow the gyoza to continue frying for a minute or two. Perfectly cooked gyoza should have a soft skin and a crisp, browned bottom. Remove from the pan and serve with the dipping sauce (instructions below).


for the dipping sauce

Mix the soy sauce, sesame oil and lime juice in a small dish. Serve with the gyoza for dip-tastic times!


What is your favourite cooking show? Have you learned any new techniques, recipes or skills from watching The Food Network?

5 Comments »

Adventures in eggs and kale

After a lovely visit to the library, I decided to find myself some food. My first thought was to take myself out to celebrate a successful library trip, but I had to drive past my house to get to the restaurant which caused feelings of guilt. Instead, I decided to stop at the grocery store for some ingredients and, boy, am I pleased that I did!

After library lunch:

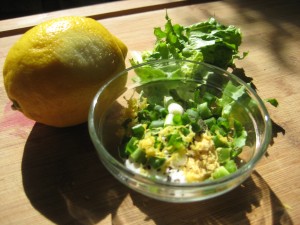
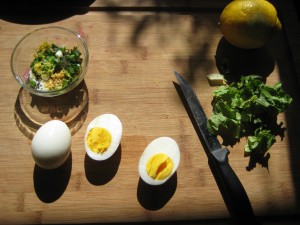
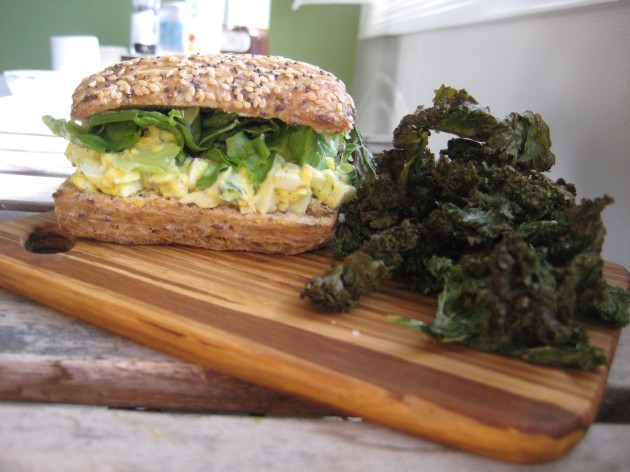
Lemon Dill Egg Salad Sandwich with Kale Chips

for the egg salad

2 eggs

1 1/2 tbsp sour cream

1/4 tsp dry mustard

1/4 tsp dill

1/4 tsp lemon zest

1 tbsp diced green onion

dash of sea salt and pepper

This step can be done in advance: Put the eggs in a pot. Fill the pot with water until the eggs are just covered. Add a splash of vinegar to contain the eggs if they crack. Bring the water to a boil. Turn the heat off, put a lid on the pot and leave for ten minutes. Drain the hot water and run cold water over the eggs to halt the cooking process. Refrigerate until needed.

Mix the sour cream, mustard, dill, lemon zest, green onions, sea salt and pepper in a bowl.

Chop the eggs. Add the eggs and stir to coat. Scoop into a bun, add some lettuce and enjoy!

for the kale chips 

from Allrecipes

2 handfuls of kale leaves (ripped off the midrib – the hard middle part)

1/2 tbsp olive oil

sprinkle of sea salt

Preheat the oven to 350F. Place the ripped up kale leaves on a parchment lined cookie sheet. Drizzle kale with olive oil and toss with your hands to coat lightly and evenly. Sprinkle with sea salt. Bake until the edges brown but are not burnt, 10 to 12 minutes.

Notes on these recipes

I did the tasks in this way to save on time: Turn on the oven. Put the eggs in the water. Prepared the kale. Mixed the egg salad spices and sour cream. Put the kale in the oven. Cooled and chopped the eggs. Mixed the egg salad. Made the sandwich. Took the kale out of the oven. Ate it happily!

This egg salad is very fresh and vibrant with a slight heat from the dry mustard. I used sour cream instead of mayonnaise out of preference and because I think it’s healthier. I like sea salt on my kale chips, but the original recipe calls for seasoning salt and there really is an infinite number of ways that you could flavour them.

How do you like your egg salad?

Leave a comment »

Adventures in toasted chickpeas

Tonight, we had a family dinner and I was in charge of salad. Whenever I prepare food for a group, I ponder their eating habits, likes and dislikes. (I learned that hosting skill from my bestie.)

I am one of four girls and it’s one of the great joys of my existence. My family is full of life and all of us sisters are within a 5 year range. I always like to think of them as built-in best friends. Back to the eating preferences: One of my sisters is vegetarian, another is on the veggie fence and the last is firmly rooted in healthy eating. With that in mind, I decided to make a salad based off of a healthy, toasted chickpea recipe that I found on a blog called Eat Yourself Skinny. I halved her recipe and slightly modified the amount of spices, but otherwise followed it pretty closely.

Toasted Chickpea and Avocado Salad

for the chickpeas
1/2 Tbsp. olive oil
3/4 tsp. chili powder
3/4 tsp. ground cumin
1/4 tsp. salt
1/8 tsp. cayenne pepper
1 (15.5 oz.) cans chickpeas, rinsed, drained and patted dry
for the salad
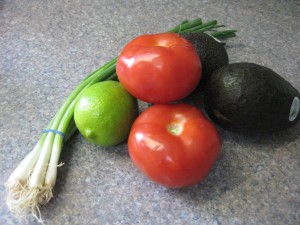
1 head of green leaf lettuce, chopped
1 tomato, chopped
1 avocado, chopped
1 lime, halved
1/2 tsp of cumin
2 green onions, diced
1/2 cup of toasted chickpeas
oil and vinegar
Preheat oven to 400 degrees F.  Arrange racks in top and bottom thirds of oven.

Place chickpeas in a large bowl. Add oil, chili powder, cumin, salt and cayenne and toss to coat.
 
Divide chickpeas between two large rimmed baking sheets.
Bake, shaking pans occasionally and rotating pans from top to bottom shelves after 15 minutes, until chickpeas are browned and crisp, about 30 minutes.
Place avocado in a small bowl. Squeeze half of a lime over the avocado for flavour and to prevent discolouration.
Add cumin and toss to coat. In a serving bowl, place lettuce, tomato, avocado, green onions and chickpeas. Toss. Serve with squeeze of lime and drizzle of oil and vinegar. Enjoy!
Notes on this recipe
My family really, really liked the chickpeas. My sister even demanded the recipe before I could blog it! The lime-cumin avocados were a hit and several of my family members chose not to dress their salads because they enjoyed the lime flavour so much. I originally had prepared a sundried-tomato vinaigrette to go with the salad, but the consensus was that they enjoyed the salad with a simpler flavour profile. I think that dressings are personal, so go ahead and experiment!
What is your favourite type of dressing? How would you dress this salad?
2 Comments »

Adventures in soap recycling

As you may have noticed in my past posts, I am vegetarian. I am also a lot of other things, including: a dog owner, grade one teacher, sister, traveller, knitter and tree-hugger. I am still even more things than that, but this post really has to do with the last one.

I care about the environment and try to make good choices for the sustainability of our planet. If nothing else, I am a very aware consumer and I think about where the products I buy and use are coming from and where they will end up when I am finished with them. I recycle, donate old items and frequent the reuse centre. I try to buy only what I need and make fair-trade/recycled/locally sourced items when possible.

I am by no means perfect, but I try to be a good earth citizen.

All this to bring us to my point, which is that I hate it when my soap dries up and crumbles into tiny little pieces. They are too small to use and often don’t lather well. They fall to the bottom of the sink and glue themselves there where they become a slimy lump.  But do you think I feel like I can throw them out?!? Of course not! They are still usable, right?

The other day, I caught Diggles using a fresh, new bar of soap when the old slime flakes were still in the soap dish! How can this be? Doesn’t he realize how valuable these left over soap seeds are to people who don’t have any soap? How can we waste this precious resource? The horror!

I think you can see my dilemma. I’m too much of a tree hugger to let Diggles use the new soap before it’s time and let the old soap go to waste, but no one wants to use the old soap (even me!).

*sigh*

“What to do?” I asked myself.

After many days (minutes) of pondering, I decided to find a way to reuse/recycle the old soap. Of course, with the internet being as fabulous and addicting as it is, I found many uses and I here present you with one: How to make new soap out of old soap. 

How to make New Soap out of Old Soap

1 million slivers of soap (or enough to fill your mold)

1 tbsp of water

perfume oil

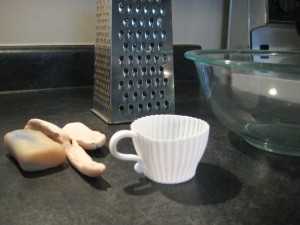
                                                          a mold of some kind     (You can use cookie cutters, a muffin mold, chocolate molds… You could even shape it into abstract sculptures!)

a cheese grater

a pot of boiling water

Grate your old soaps into a heat-proof glass bowl. I grated my chunks of soap that I despise so much, but also added a few grated swipes of a bar that contains more glycerin because I thought it would help it melt/hold together better.


Add one tbsp of water to the soap flakes.  If you want, you can add in new scents at this point. I added 12 – 15 drops of The Body Shop’s Satsuma Perfume Oil.

Put the bowl over the boiling water to create a double-boiler. Obviously, you can use your real double boiler, but I thought it would be easier to clean soap off the bowl.

Stir the soap-water mixture while it heats. Melt the soap into a gluey mush.

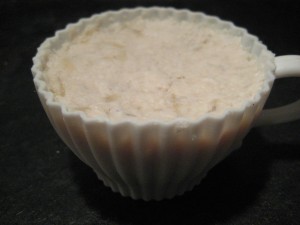
Scoop it out with a spatula and put it in your mold. I used a silicone teacup cupcake mold for easy removal.

Let it cool and harden. I put it in the freezer to speed things along.

Be happy that you didn’t waste your soap bits and wash your hands gleefully!

What do you do with your old bits of soap? Do you have things you don’t like to waste?

3 Comments »

Adventures in sweet potato (part 2)

I hope you have all been tempted to try Sweet Potato Hashbrowns and, if not, I will now try to tantalize you further with…

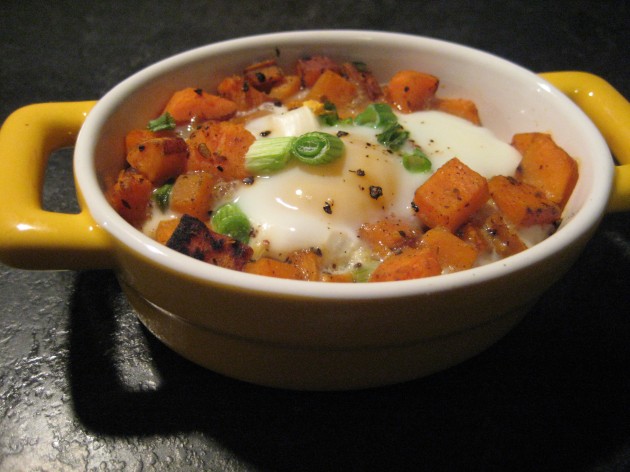
Baked Eggs in Sweet Potato Nests

makes 1 serving

1 cup of Sweet Potato Hashbrowns, cooked

1 egg

2 tsp milk

sprinkle of diced green onions (for garnish)

dash of sea salt and pepper

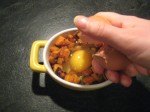
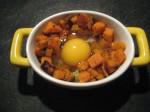
Preheat the oven to 375F. Place the sweet potato hashbrowns in a small, ovenproof dish. Dig a hole in the middle of the hashbrowns. Crack the egg into the hole. Pour the milk over the egg. Sprinkle the green onions, sea salt and pepper over the egg.


Bake in the oven for about 12 minutes for medium eggs. When you pull them out, they should have a slight jiggle in the very centre. (They will firm up as they rest.) Let them rest for a minute or two on the counter, then serve. The yolk should have a creamy consistency, while the whites are fully cooked. Serve with fruit and enjoy!

Notes on this recipe

If you don’t have a small ovenproof dish or you want to make many servings, you could use a standard muffin tin and fill all the holes. I would check the eggs periodically for doneness and do a jiggle test since they will be ready at a different time than when made in a glass or ceramic dish. When using a muffin tin, the hashbrowns will probably create a kind of base for the egg on the top, as it would be more difficult to create the nest shape.

Another variation on this recipe would be to use standard potato hashbrowns or even a mix of the two. YUM!

If you’ve baked eggs in muffin tins before, what are your experiences? What’s the perfect amount of time in the oven?

Leave a comment »